Websites are constantly fighting each other in a digital war for your attention. People’s time spent online is a valuable currency for a website. Your goal should be to prove to users your site is the most unique and enriching experience they can have, and the next cutting edge tool to do this is virtual reality. While VR still carries a slight musk of a 90s sci fi movie, it is a rapidly growing industry and available technology to the masses.
What is the first step to implement VR media on a website?
Google is one of the industry leaders driving the charge of VR media online. Creating low cost viewers like, Cardboard, and releasing open source code with documentation, Google has shown their interest in virtual reality. Working with a developer or webmaster, you can follow the steps Google has outlined in order to host VR media on your website.
How do I actually put virtual reality media on my website?
After your preliminary research, the best place to start is this Google Codelab.
Here is an excerpt from their introduction: “This codelab will teach you how to embed 360 degree VR media into websites using VR View. This technology is designed for developers of traditional apps to enhance them with immersive content. For example, VR view makes it easy for a travel app to provide viewers with an underwater scuba diving tour as they plan vacation or for a home builder to take prospective buyers on virtual walkthrough before the home is built.” As a hotelier or event space marketer, VR is changing the way you can tell your property’s story.
What resources are needed to bring 360 VR photos to my hotel’s website?
The Google Codelab outlines everything you need to develop and place the “VR View” on your page. Everything from a updated web browser, HTML editor, and VR View source code can be found under the “What you’ll need” section. However, there are a few specific pieces of media needed in order to get the desired visuals.
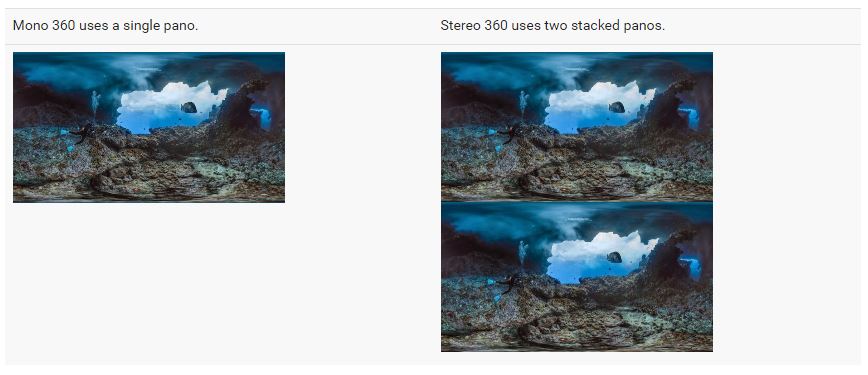
In order to properly use the VR View code, “images and video need to be stored in the equirectangular-panoramic (equirect-pano) format, which is a common format supported by many capture solutions.” (Google Developers) These images must be formatted as follows:
- VR view images can be stored as png, jpeg, or gif. VR view videos should be stored as mp4s encoded with h264.
- For maximum compatibility and performance, image dimensions should be powers of two (e.g., 2048 or 4096).
- Mono images & videos should be 2:1 aspect ratio (e.g. 4096 x 2048).
- Stereo images & videos should be 1:1 aspect ratio (e.g. 4096 x 4096).
Following the Major Steps
Gather Resource, Code, & Test Environment
Once you have your media resources in the appropriate format(s) (found above), download the sample code provided via the Codelab and prepare a space to host the code.
Adding VR View Code and Media
Using either Google’s test server extension or personal server, host the code and media files that you have prepared. The VR View code should have its own directory on your site titled “vrview.” Next, add your media files that you prepared in the appropriate formats to the image directory found in the “vrview” directory you just added. (There is a sample image and video enclosed in the files you downloaded if you are just practicing.)
Adding the VR Image or Video to the Webpage
Edit the HTML on the sample index page or on your desired webpage to include the following:
<iframe

frameborder="0"

width="100%"

scrolling="no"

allowfullscreen

src="vrview/index.html?image=/images/converted.jpg&is_stereo=true">

</iframe>
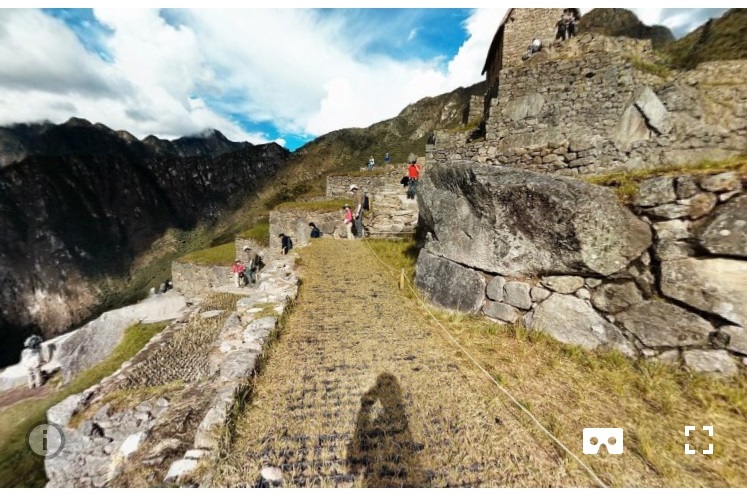
This iframe calls to the code and resources found in the “vrview” directory. The “src=” is the source of your media to display via the VR View code. If done correctly you should have something that looks like this:
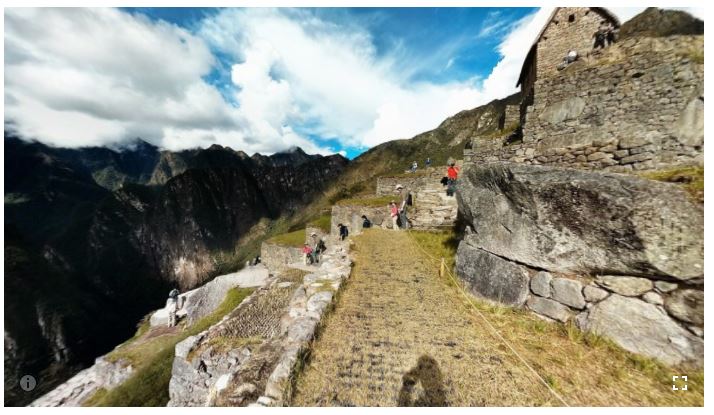
On desktop screen sizes, your images will pull into a similar format as Google Map’s Street view or most 360 degree photo tours. The cursor can click and drag the image in a 360 degree format. VR comes into play when you pull the resource up on your mobile device.
You notice that the Google Cardboard icon will appear:
Your phone now becomes a window into the world you just created. Every direction you pitch and roll your phone, the corresponding view comes into focus on the screen. The phone becomes an interactive viewer of the image or video. While this is an amazing feature on its own, there is more! Clicking on the Cardboard icon will prompt users to place their phone in a Cardboard viewer or similar VR headset device. Your device will then display the split screen double image that the VR viewer will compile and display the virtual reality experience to the wearer of the headset.
Examples
Google’s Codelab Examples
- https://storage.googleapis.com/vrview/examples/pano/index.html – image
- https://storage.googleapis.com/vrview/examples/video/index.html – video
Blue Magnet’s Implementation:
Try Our Headset Configuration for Mobile VR
If a Picture is Worth a Hundred Words, How Much is VR Worth?
Proving to your visitors your website is the best and valuable way to spend their time is your number one goal. Easier said than done as web visitors have very high standards as they surf around the web. Page loads too slow, images fail to load correctly, or maybe your content is just boring. These are all reasons why website users will bounce from your site, and perhaps never come back. Providing value to visitor is how you get them to stay and interact with your site. Virtual reality is a growing trend and the way it is presented via online mediums is a cutting edge technology. Adapting your website to utilize content such as a virtual reality tour will result in a huge value to your visitor.
VR can be tricky, especially getting it to cooperate with your website and effectively leveraging the media as a marketing material. Have questions or want some help bringing your website into the virtual reality age? Look no further, Blue Magnet would love to assist you on the cutting edge technology that is VR. Drop us a line and let’s start talking in a new reality!
Warning, virtual reality can be more awesome than expected!
